
Assemble Guac
Learn how to properly set up your Guac Booth as the foundation for creating amazing events.
Table of Contents
Before You Start
Quick Start Video
ASSEMBLY STEPS
Next Step
Before You Start
Camera and iPad Setup and Installation
The steps for installing and setting up the camera and iPad must be completed before continuing on with assembling the Guac Booth.
If you have not completed these steps yet, you can find the guides below:
IMPORTANT: If you are located outside of the US please ensure that you use a 240->115v step-down transformer rated for 1kw or higher before plugging your Guac booth in to avoid any damage.
Before You Start
Required Parts

The following parts are required for assembling the Guac Booth:
Base plate
Two poles
Guac head (with camera and iPad installed)
Flash
Reflector
Umbrella
25’ AC power cable
Philips head screwdriver
Optional parts:
Printer USB cable
Quick Start Video
Guac Assembly Walkthrough
In this video, you’ll learn how to:
Assemble the base plate, poles, and Guac head
Attach the flash, reflector, and umbrella
Connect the flash sync cable
Adjust the flash settings
Power on Guac
Step One
Attach the Base Plate and Poles

Place the base plate on the floor with the longer half facing away from the backdrop.
Run the AC power cable under the base plate and through the hole (about two arms length).
If you’re using a printer, run the USB cable through the hole as well.
Run the power cable (and printer USB cable) up through the first pole.
Attach the first pole to the base plate by loosely tightening both knobs on the pole at the same time.
Repeat steps 3-5 for the second pole.
Adjust the AC power and printer USB cables so that about 1 to 2 inches are coming out from the top of the poles.
Step Two
Attach the Guac Head

Loosen the screw on the back of the Guac head and carefully remove the back door.
Carefully lift the Guac head and plug the AC power cable (and printer USB cable) into the bottom.
Place the Guac head on top of the pole with the iPad and camera facing the backdrop.
Fully tighten the knobs inside the Guac head.
Plug the AC power cable into an outlet.
Check the power strip to make sure that “Protected” is green and “Not Grounded” is off.
Flip the switch on the top of the camera to turn it on and check for power.
Step Three
Attach the Flash and Umbrella
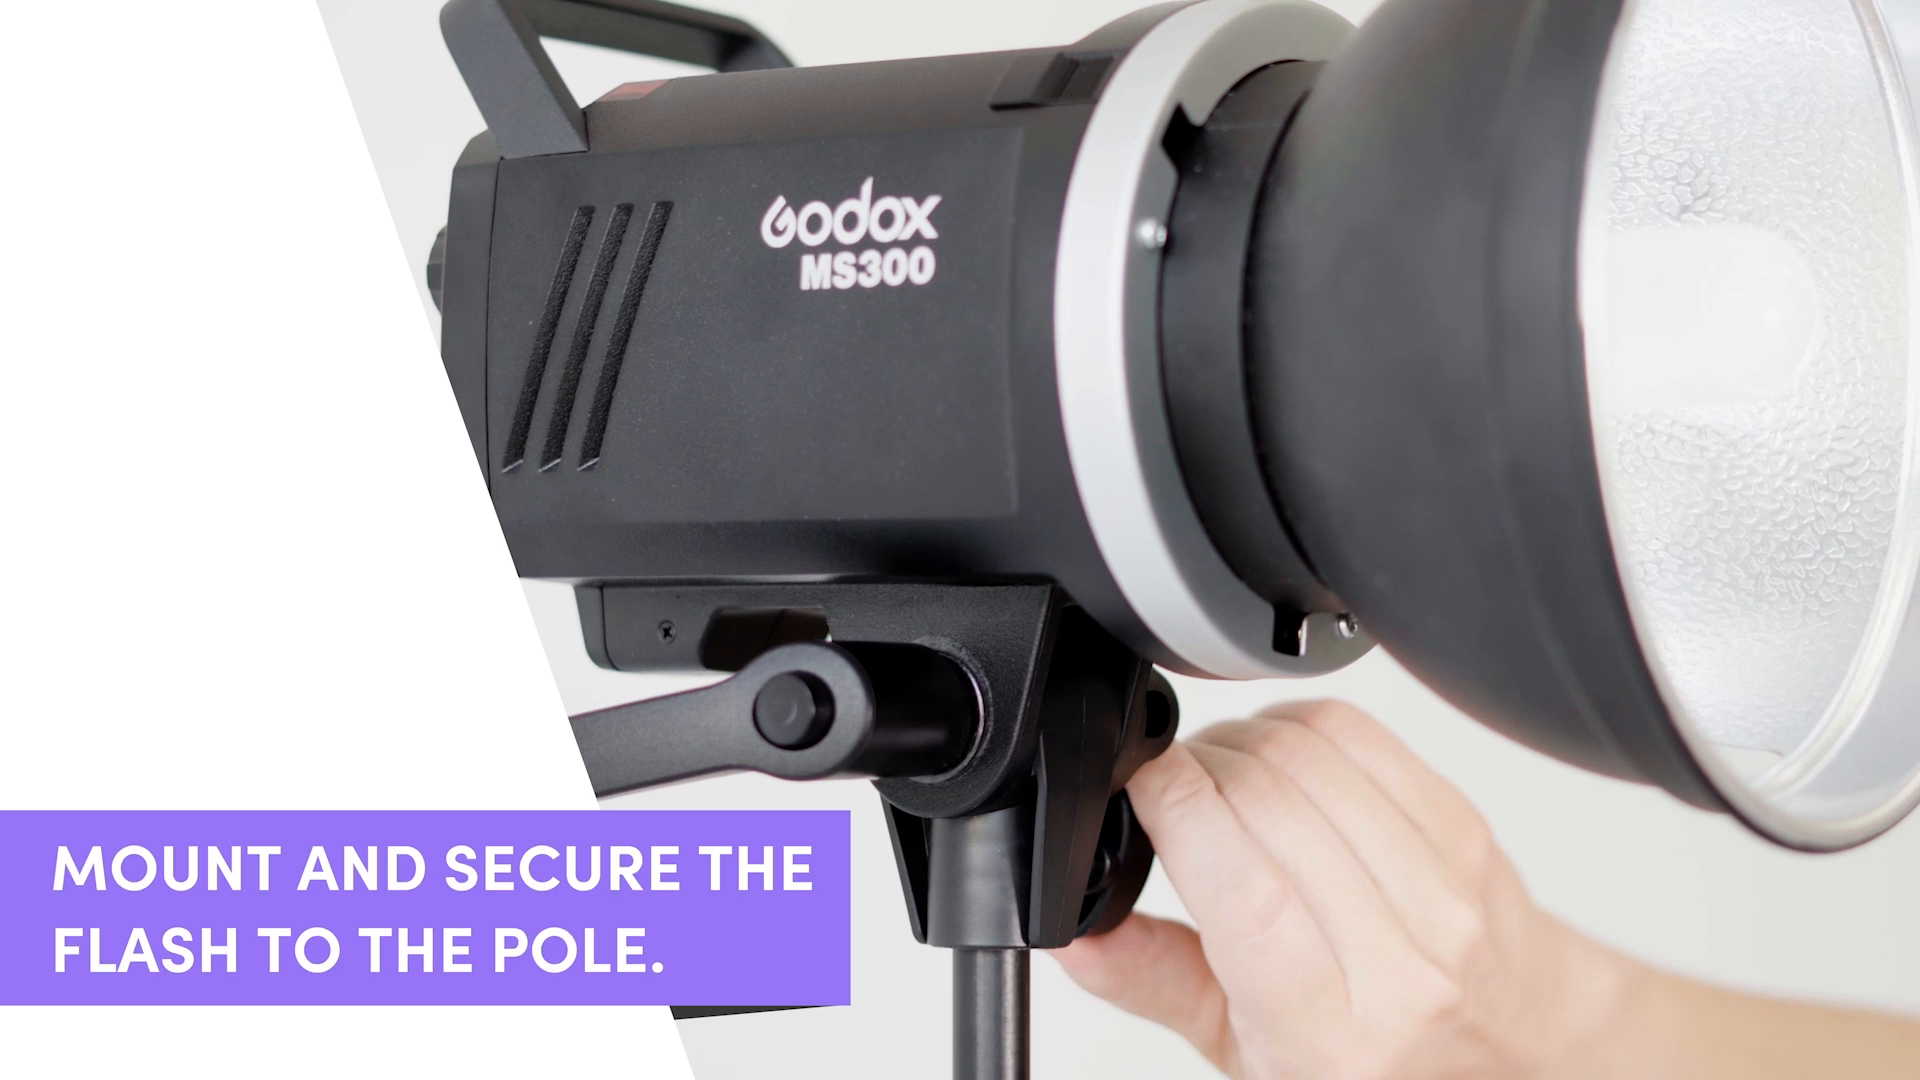
Remove the flash pole from the carrying case.
Screw in and tighten the flash pole to the top of the Guac head.
Remove the black plastic cover from the flash by pulling back the quick release switch and turning the cover.
Attach the reflector to the flash and rotate to lock it in place.
Tip: Make sure that the slit on the reflector aligns with the umbrella mount on the base of the flash handle.
Rotate the larger tilt lock handle on the flash to loosen the flash pole mount.
Adjust the flash pole mount so that it is at a 90 degree angle and tighten the tilt lock handle again.
Unscrew the smaller flash pole mount lock to loosen until it cannot be seen when looking down in to the flash pole mount.
Place the flash on the pole with the bulb facing the back of the booth and tighten the flash pole mount lock again.
Loosen the tilt lock handle again and adjust the flash to face up at a 45 degree angle, tightening the handle after.
Open the umbrella and slide the umbrella pole through the slit in the reflector and through the umbrella mount on the flash.
The umbrella pole should extend about 1/4 of an inch past the flash.
Step Four
Plug in the Flash and Configure Settings

Plug the power and sync cable into the flash.
Flip the switch on the back of the flash to turn it on.
Press the light bulb button on the back of the flash to turn on the modeling lamp.
Press the button again until the screen reads “100%” in the bottom right corner.
Press the volume button to silence the flash beeps.
Rotate the dial on the back of the flash and set the power to 1/2.
Replace back door by aligning the bottom hooks with the holes in the Guac head.
Lift the back door up and tighten the knob to secure it in to place.
Note: To prevent the flash from being triggered by other flashes or devices in the area, disable the flash WiFi by holding down the GR/CH and S1/S2 buttons at the same time until the WiFi icon disappears from the top left of the display screen.
Next Step
Set up the Guac Dashboard

You’re almost there! This last step is just as important as the rest and is required to ensure that your hardware is connected and your Guac is ready to go for its first event!