
M50 II Camera Setup
Learning your equipment and how to properly set it up is important in being able to consistently provide an amazing experience to your clients and their guests.
Table of Contents
Before You Start
Quick Start
Steps
What to know
Before You Start
Required Parts

The following parts are required:
Canon M50 Camera
Canon Battery
Canon Battery Adapter
Nikon AS-15 Flash Adapter
Flash Sync Cable
Camera Sync Cable
Guac Head
Quick Start
Video Walkthrough
In this video, you’ll learn:
How to attach the flash sync cable
Set the Canon camera settings
Install the camera into Guac
Quick Start
Camera Settings
For All Captures Modes:
Camera mode dial: Manual (M)
Continuous Auto-Focus (AF): Enabled
Focus Mode: Auto Focus (AF)
Image Stabilization (IS): Disabled
Image Quality: S1 (Fine)
Auto Power Off: Disabled
Movie Shooting Mode: Manual Exposure
For Slo-Mo Mode:
All the previous settings
High Frame Rate: Enabled
Frame Rate: 119.9P
Learn more about how to set up Slo-Mo Mode on Guac
IMPORTANT: You may need to change the camera Mode Dial to Movie in order to access some of the above settings.
Be sure to set the Mode Dial to Manual (M) after adjusting any settings on the camera.
Step One
Attach the Flash Sync Cable
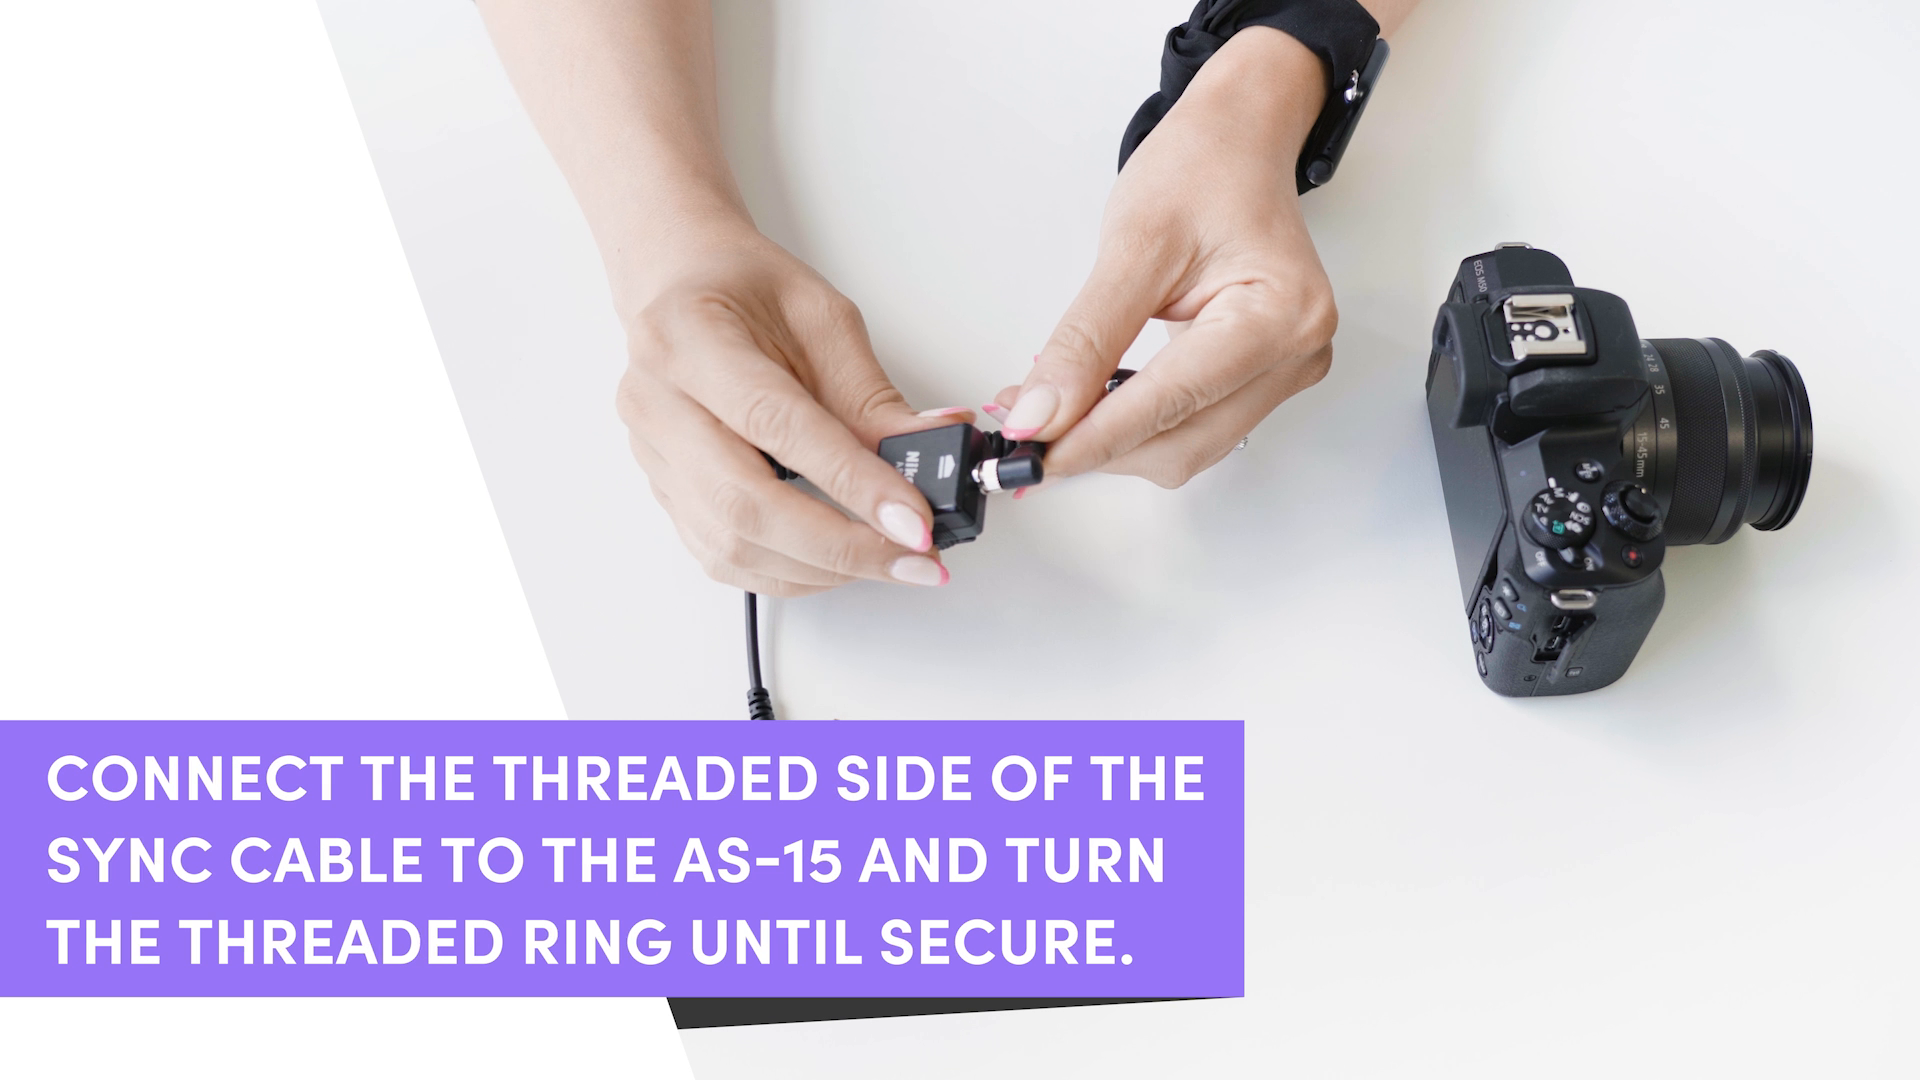
Plug the threaded side of the sync cable into the Nikon AS-15 flash adapter.
Rotate the threaded ring to securely attach the sync cable to the flash adapter.
Unlock the bottom of the flash adapter by rotating the dial below where it says “LOCK”.
Attach the flash adapter to the camera by sliding it into the hot shoe on top of the camera, with the sync cable facing the front.
Lock the flash adapter by rotating the dial until it is secure.
Step Two
Unlock the Lens

Looking down from the top of the camera, locate the switch on the side of the lens.
Unlock the lens by simultaneously sliding and holding the switch and rotating the lens.
Continue to rotate the lens until the white dash above the Canon logo aligns with “15” on the lens.
Release the switch.
Step Three
Set the Camera to M
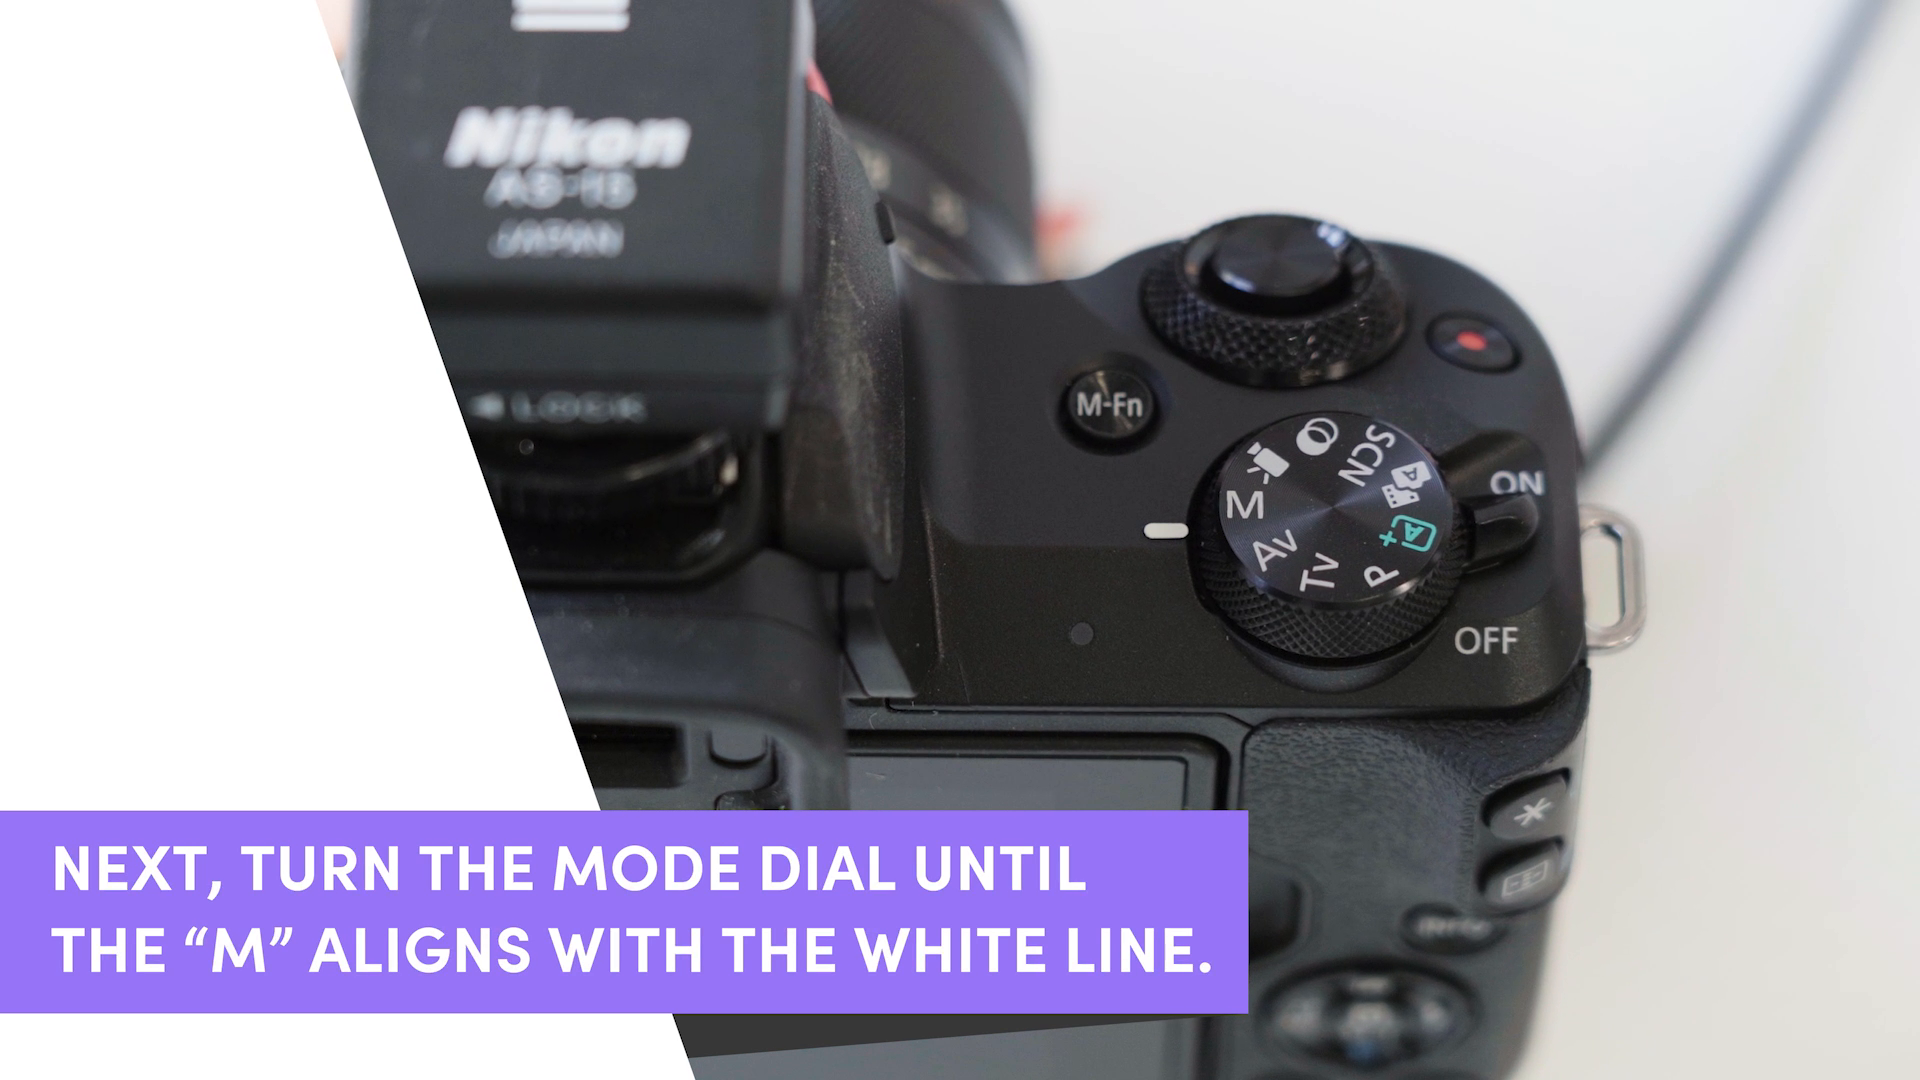
Locate the Mode Dial on the top of the camera.
Rotate the dial until the white dash aligns with M (Manual exposure).
Step Four
Reveal the Screen
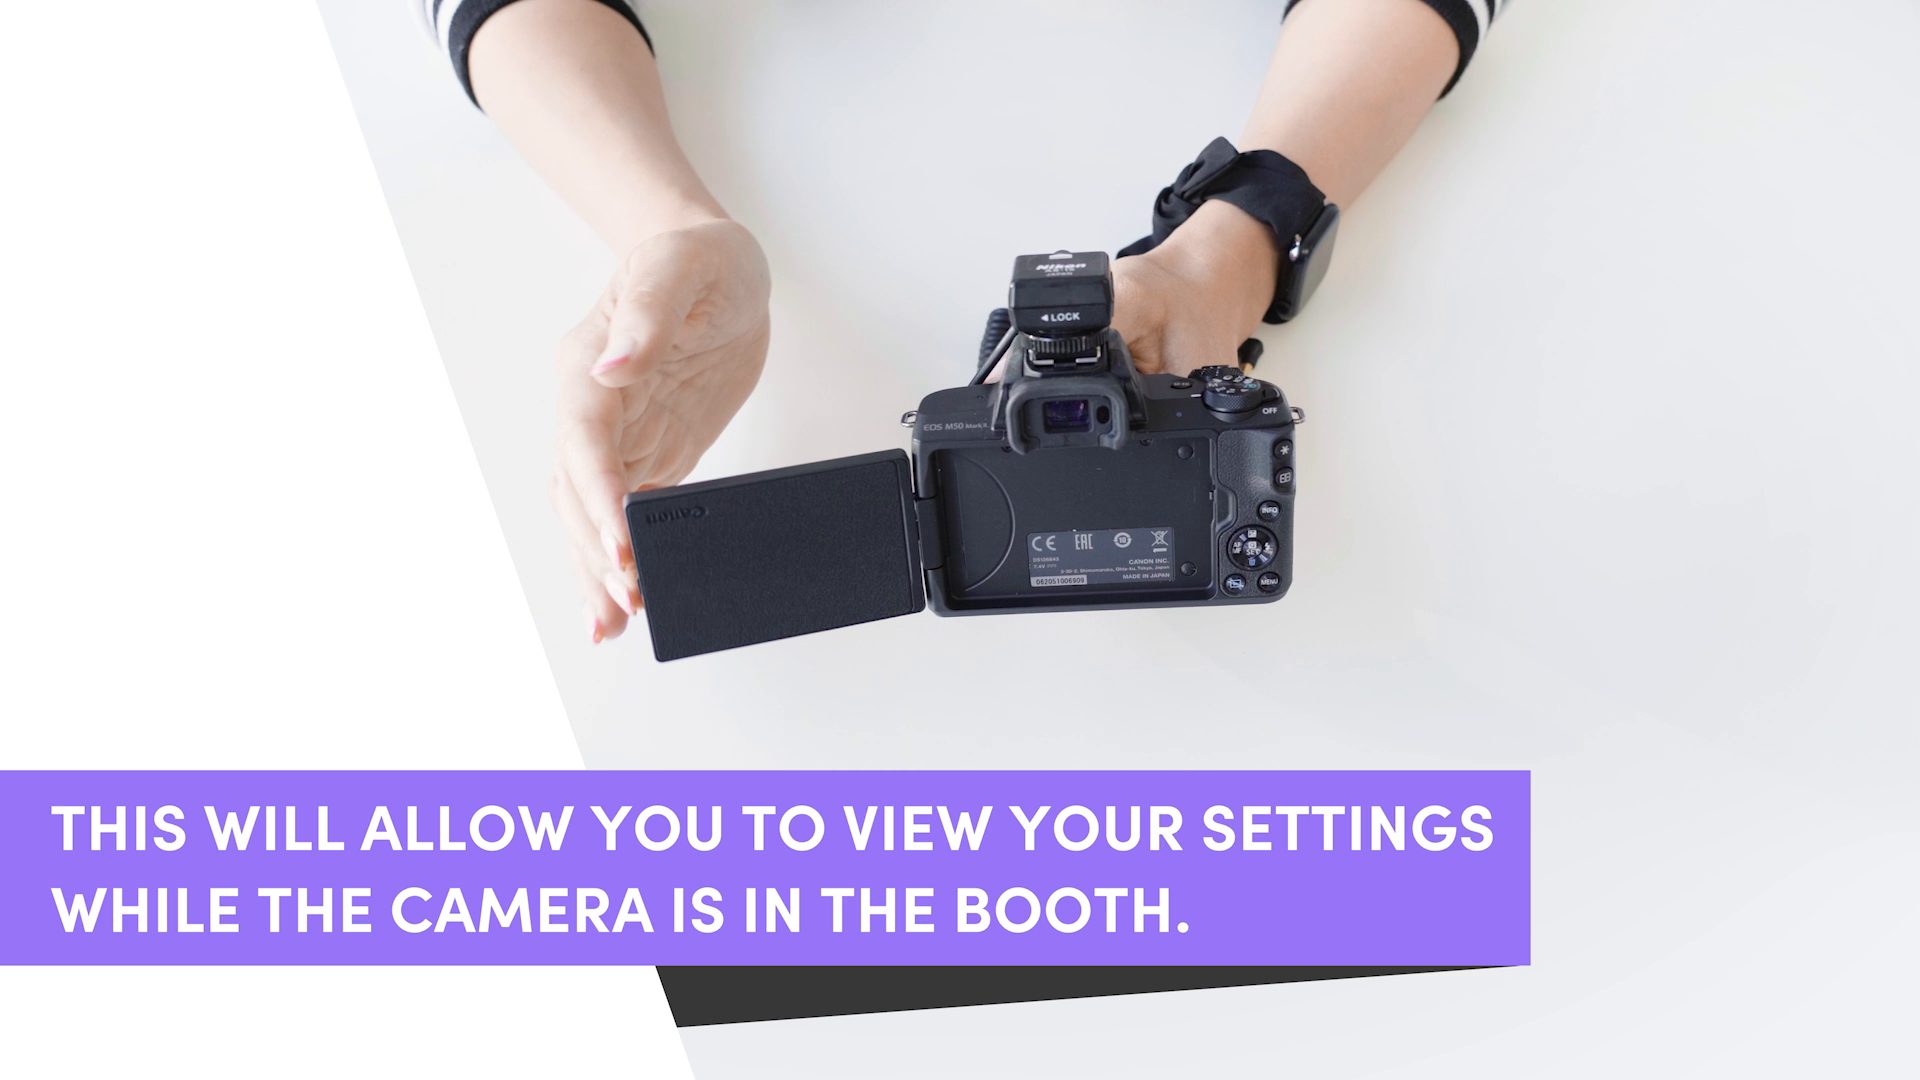
Looking at the back of the camera, flip open the screen.
Rotate the screen up 180º so that it is now facing the other direction.
Flip the screen closed so that it is now facing you.
Step Five
Insert the Battery

Looking at the bottom of the camera, open the battery compartment door by sliding it to the side.
Insert the battery into the compartment until it locks into place.
Tip: The metal contacts on the battery should be facing in and on the side closest to the back of the camera.
Note: If the camera does not turn on, remove the battery and charge it using the charger included in the camera box.
Step Six
Insert the SD Card

Locate the SD card.
Insert the SD card by sliding it into the slot just above the camera.
Make sure that the metal connectors are facing the back of the camera.
Press it in until it clicks into place.
Close the battery compartment door.
Turn the camera on by flipping the switch next to the Mode Dial.
Note: If the camera does not turn on, remove the battery and charge it using the charger included in the camera box.
Step Seven
Configure Camera Settings

Navigating the Camera Settings
The camera settings can be accessed by pressing the Menu button on the back of the camera.
You can then use the top, bottom, left, and right buttons found around the Set button to navigate through the settings screens.
The Set button can be used to select or confirm.
Turn Off Image Stabilization (IS)
Press Menu.
Go to Menu 6.
Go down and select IS (Image Stabilization) mode.
Set IS mode to Off.
Set to One Shot AF
Select Shooting settings.
Go to Menu 4.
Select AF operation.
Set to ONE SHOT AF.
Enable Continuous AF
Select Shooting settings.
Go to Menu 4.
Go down to Continuous AF.
Set to Enable.
Set Focus Mode to AF
Select Shooting settings.
Go to Menu 4.
Go down to Focus Mode.
Set to AF (Auto Focus).
Set Image Quality to S1 (Fine)
Go to Menu 1.
Set image quality to S1 (Fine).
Tip: Fine is identified by a smooth quarter circle icon.
Disable Auto Power Off
Press Menu.
Move right to Function settings.
Go to Menu 2.
Go down to Power saving.
Go down to Auto power off.
Set to Disable.
Set Display Control to Manual
Press Menu.
Move right to Function settings.
Go to Menu 3.
Select Display Settings.
Select Display Control.
Set to Manual.
Set Movie Shooting Mode to Manual Exposure
Turn mode dial to video camera icon.
Press Menu.
Select Shooting Settings.
Go to Menu 1.
Select Shooting Mode.
Set to Manual Exposure.
Turn the Mode Dial back to M.
Note: Slo-Mo Mode requires additional camera settings.
Step Eight
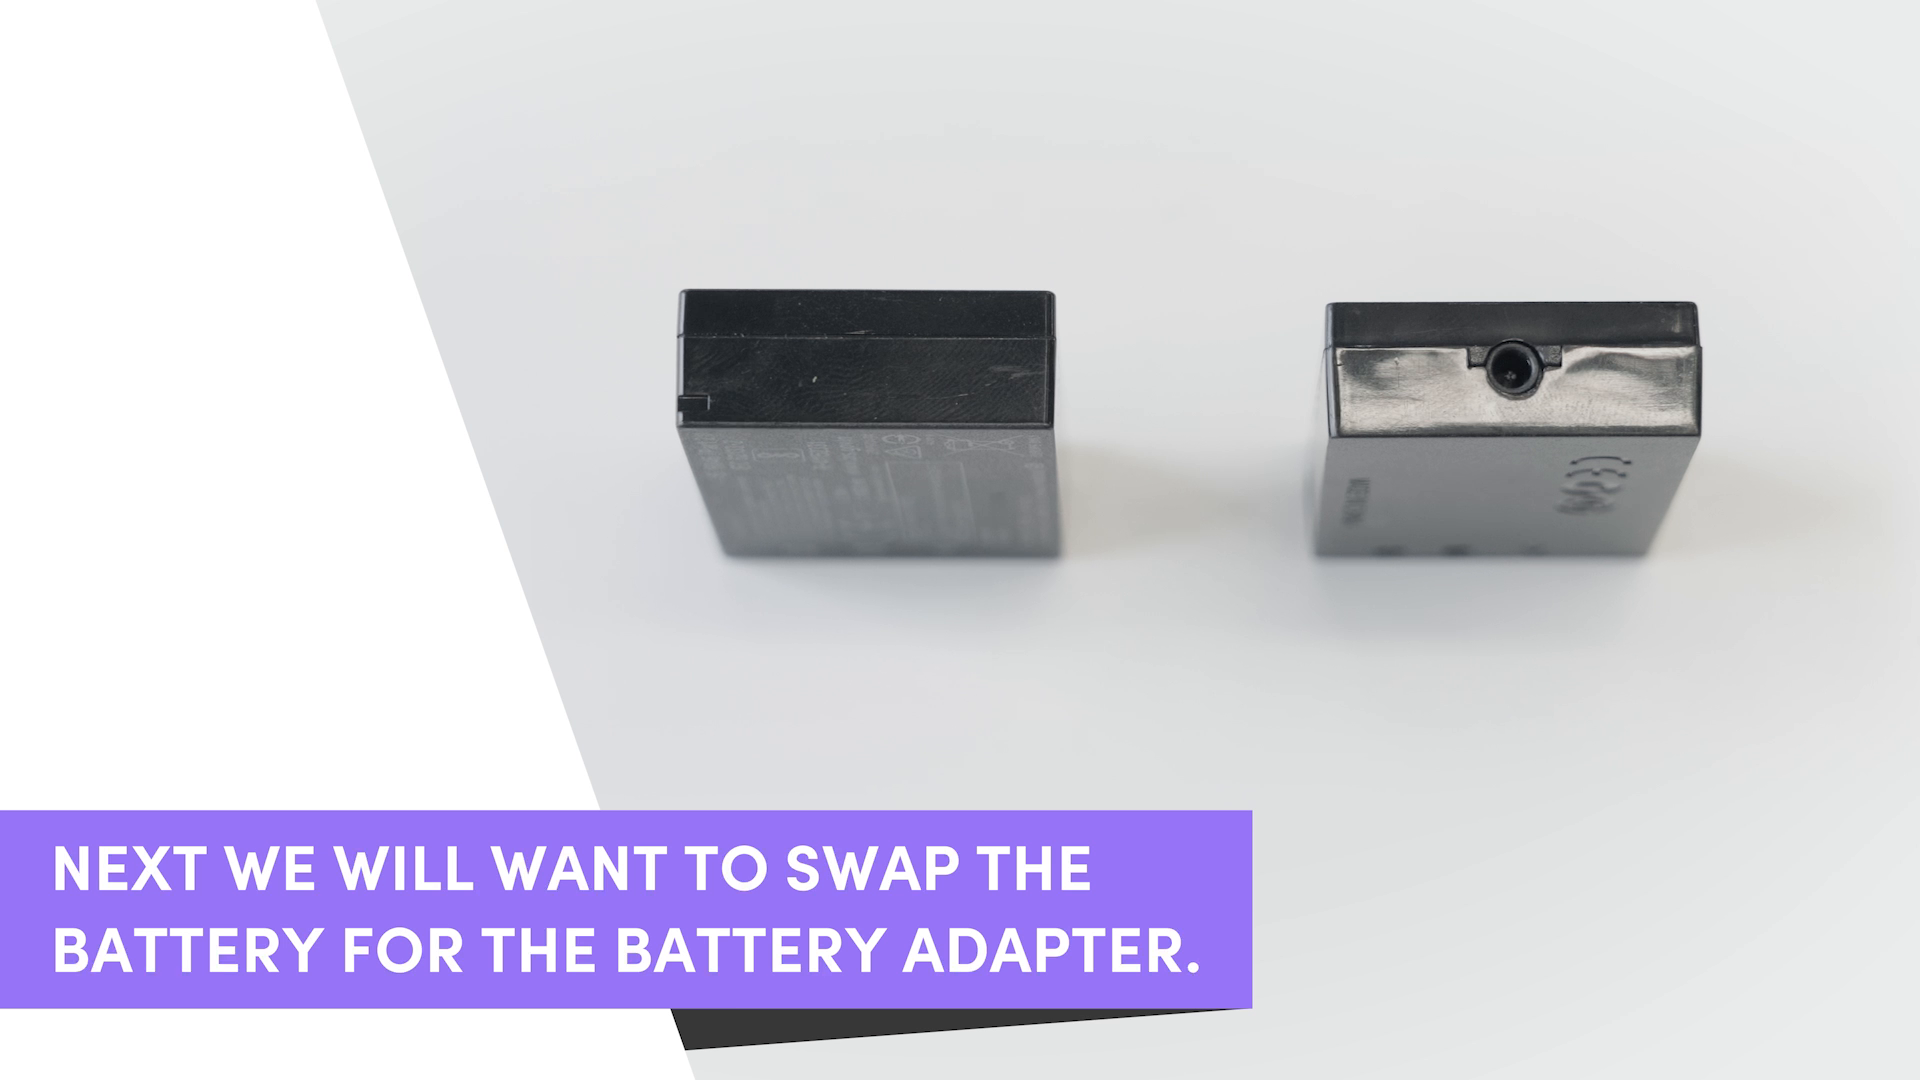
Swap the Battery Adapter
Turn the camera off by flipping the switch next to the Mode Dial.
Open the battery compartment door again by sliding it to the side.
Unlock and remove the battery by sliding the grey clip to the side.
Insert the battery adapter into the camera until it locks into place.
Note: The metal contacts on the battery adapter should be on the side closest to the back of the camera and the plug should be facing you.
Close the battery compartment door.
Flip open and rotate the rubber cover to reveal the DC cord hole.
Step Nine
Install the Camera

Place the Guac head face down onto a clean, flat surface.
Turn the knob on the back of Guac to unlock the back door.
Use the knob to lift and remove the door, setting it to the side.
Locate the camera nut and rubber washer.
Place the rubber washer on top of the the camera rack and align it with the slit
Place the camera nut on the bottom side of the rack and screw it through the rack and the rubber washer to keep it from falling out.
Place the camera into the Guac head and on top of the rack, aligning the camera nut with the tripod socket.
Tighten the camera nut to secure the camera in place.
Step Ten
Connect the Cables

Remove the protective stopper on the top of the Guac head and set it aside.
Locate the sync cable and feed it through the top of the Guac head.
Locate the battery adapter cable attached to the inside of the Guac head.
Plug the battery adapter cable into the battery adapter’s DC cord hole on the bottom of the camera.
Note: Make sure it is plugged in securely.
Locate the camera’s data cable and connect the larger USB plug (USB-A) into the USB hub.
Open the USB and HDMI port cover on the right side of the camera.
Connect the other end of the data cable (microUSB) to the top port on the right side of the camera.
Place the camera into the “On” position by flipping the switch next to the Mode Dial.
What to Know
Salsa In-App Camera Settings
Along with the Canon Camera Settings, you also have control over the Salsa In-App Camera Settings. These settings work together to allow you the ability to fine-tune how captures will look when running a DSLR event using the Salsa iOS app.