
Overlay Editor
Create and edit amazing overlays using one of the many designs available in Salsa’s Overlay Library or build your own directly from the Salsa web app.
Table of Contents
Quick Start Video
How To
What To Know
Explainer
Quick Start Video
How to Create an Overlay Using the Overlay Editor

In this video, you will learn:
How to access the Overlay Editor
How to use or edit previous designs
How to create a new overlay design
How to choose your overlay size
How to use the Overlay Library
How to add images and text
How to use the Overlay Editor Tools to create and edit a design
How to download a PSD version of an overlay from the Library
Explainer
What Is the Overlay Editor?
The Overlay Editor is a feature available exclusively on the Salsa web app for building and designing the perfect overlays for you event.
You can either select from a large library of fully designed overlays with customizable text and add additional images to fit your event.
Or you can create an overlay from scratch by uploading different graphics and adding text.
How To
Access the Overlay Editor
The Overlay Editor is accessed when adding an overlay from the Capture Settings.
To access the Overlay Editor:
Log in to the Salsa web app
Select an event or create a new event
Click Configure Event
Click the Capture Settings tab
Click Overlays
Click Add Overlay
From here you can click Use Overlay Library to create a new overlay design or select one of the pre-made designs.
Or you can add a previously made design in the Overlay Editor by clicking Use Previous Design.
Note: Use Previous Design does not include overlays uploaded outside of the Editor – to add a previously uploaded overlay asset, add it to a blank overlay design.
What To Know
Overlay Sizes and Dimensions
The Overlay Editor supports three different layouts when creating your own or selecting one from the library.
These layouts have specific dimensions and aspect ratio which can be adjusted from the event’s camera settings on the Salsa iOS app.
When creating your own overlay, it is important to add overlay files that match the dimensions of the selected overlay layout.
Portrait
Overlay size: 2048 x 2732
Aspect ratio: Traditional Portrait 3:4
Landscape
Overlay size: 2732 x 2048
Aspect ratio: Traditional Landscape 4:3
Square
Overlay size: 2048 x 2048
Aspect ratio: Square 1:1
What To Know
Using the Overlay Library
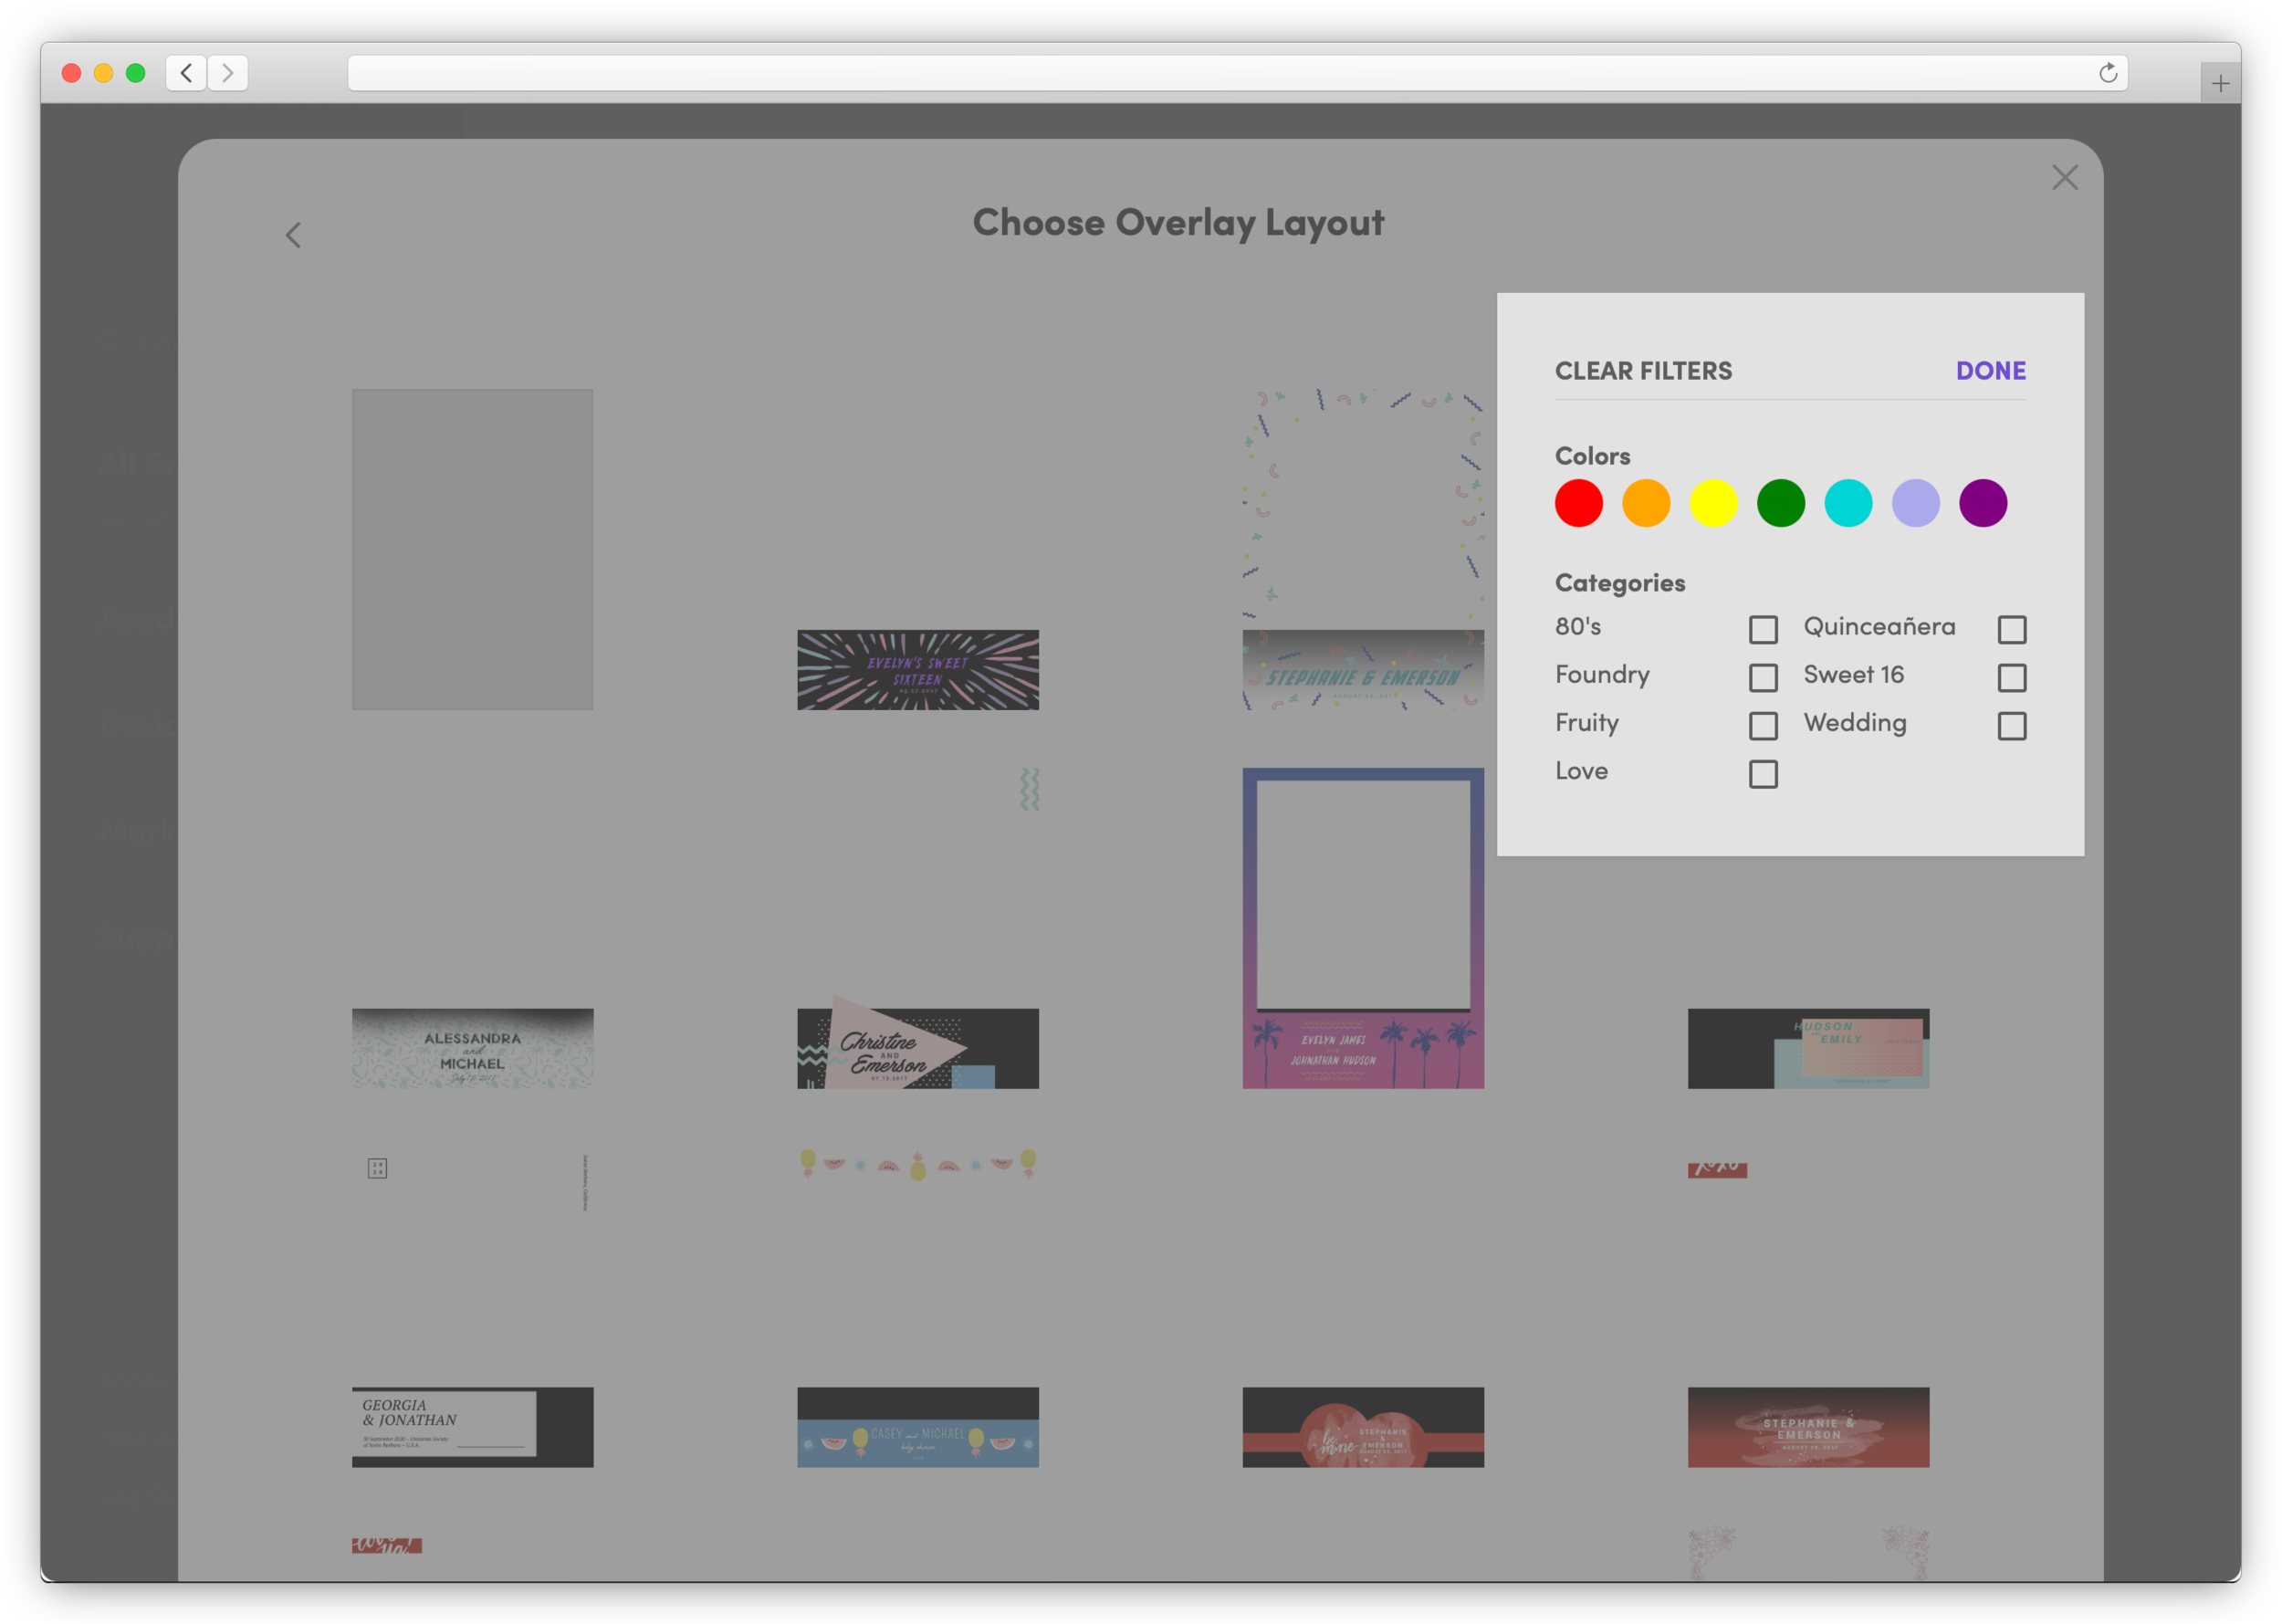
From the Overlay Library you can create your own custom overlay by selecting the blank overlay in the top left of the library.
You can also choose a pre-designed and customizable from one of the many options available.
To find an overlay that fits your event, you can use the Filter in the top right. You can filter by color and theme by clicking the color circles or the checkbox next to the theme.
What To Know
Overlay Editor Toolbar
The Overlay Editor toolbar is used to add pre-made overlay graphics additional art assets, add text, and undo or redo changes.
The toolbar consists of four buttons:
Add Image (overlay and art asset)
Add Text
Undo
Redo
What To Know
How Layers Work
Each images and text placed within an overlay, including the captures taken by guests, is on its own layer and each additional object is stacked on top of the last.
The furtherest back layer of an overlay is the capture taken by the guest. Everything else is placed on top of that capture including the actual overlays, text, and any art assets.
The typical order of layers for overlays (from back to front) is:
Guest capture
Overlay
Art asset
Text
You can use the buttons on the toolbar that appears when an image or text is selected to move that layer forwards or backwards.
How To
Add an Overlay
Overlays are a single layer graphic that is placed on top of the capture.
You can add multiple overlays, however each one will be placed on top of the previously added overlay, which might cover or block them from being seen.
To add an overlay:
Access the Overlay Editor for your event
Click Use Overlay Library
Select the overlay dimension you want to use
Click the blank overlay design (grey box)
Click the Add Image (+) button
Click Select Overlay
Select an overlay from your Asset Library or click Upload File to upload a new overlay file from your computer
Note: It is important to add an overlay that matches the dimensions of the selected overlay size.
How To
Add an Art Asset
To add an art asset:
Access the Overlay Editor for your event
Click the Add Image (+) button
Click Select Art Asset
Select an art asset from your Asset Library or click Upload File to upload a new art asset from your computer
What To Know
Using Art Assets
Art assets work differently than overlays as they will not be stretched to match the size of the entire capture frame.
If an art asset is too large to fit inside of the capture frame it will be made smaller, but it will still have the same proportions, meaning it will still look as expected.
If the art asset is smaller than expected after adding it to the template you can resize it to be larger. However, this may cause the image to look blurry or pixelated. To fix this, find or create a larger image to upload.
How To
Move, Resize, or Delete Overlays and Art Assets
All image files uploaded to an overlay can be moved, rotated and resized to fit exactly what you need.
When an image is selected, it will display a white object selection box around it with circle “handles” at each corner and one directly above it. These can be used for resizing or rotating.
A toolbar will also be displayed in the top left corner of the image. The buttons on the toolbar allow you to move the image forward or backward on the overlay design to place it in front or behind other images in the overlay.
To resize an image:
Click to select the overlay or art asset
Click and hold one of the corners and drag
To rotate an image:
Click to select the overlay or art asset
Click and hold the top circle handles and drag across the screen in the direction you want to rotate it
How To
Add Text
To add a text to your overlay:
Access the Overlay Editor for your event
Click the Add Text (T) button
Click the new text field to select and edit the text
The text will appear in the top left corner of the overlay with a default “Change Text” written inside. You can move, resize, and edit the text as needed for your template using the Text Editing Tools.
Note: The text default is set to black. If your overlay is dark it may be difficult to see. You can either click the top left corner of the overlay to select the text and move it or select the overlay and move it temporarily to reveal the text.
How To
Move and Resize Text
When text is selected it will reveal an object selection box around the text field.
The object selection box includes seven white circles, or handles, for changing the size of the text or rotating entire text field.
To move the text:
Access the Overlay Editor for your event
Click the and drag the text to where you want to place it
Note: The text will not move if the object selection box is visible. You can click anywhere outside of the object selection box to dismiss it.
To change the size of the text:
Access the Overlay Editor for your event
Select existing text or add a new text field
Click and drag one of the handles in the corner of the text field
Note: Clicking and dragging the handles on the side will only increase the width of the text field, but the text will remain the same size. This is useful when changing the text alignment.
To rotate the text:
Access the Overlay Editor for your event
Select existing text or add a new text field
Click and drag the top handle in the direction you want the text to rotate
What To Know
Text Editing Tools

The Text Editing Tools include the following functions:
Font Selection
Style Selection
Font Color Selection
Text Alignment
Move Layer Forward
Move Layer Backward
Delete Text
How To
Select a Font
The Overlay Editor has nearly 100 unique fonts, some with different styles, to choose from when designing the perfect look to your overlay.
To select a font:
Access the Overlay Editor for your event
Select existing text or add a new text field
From the text editing toolbar, select the leftmost dropdown menu
Click a font to select it
How To
Select a Font Style
Some of the fonts also have additional styles to choose from. These styles include options for font weights such as light, regular, bold, and more.
To select a font style:
Access the Overlay Editor for your event
Select existing text or add a new text field
From the text editing toolbar, select the second dropdown menu
Click a style to select it
How To
Change Text Color
The Overlay Editor allows for adjusting the text color as well as the opacity, or transparency, of the text.
To change the font color:
Access the Overlay Editor for your event
Select existing text or add a new text field
From the text editing toolbar, click the color circle
Enter in the specific hex value or use the color selection window to dial in the color and brightness
To change the opacity/transparency of the font, move the bottom slider in the color selection window.
How To
Change Text Alignment
You can use the editing tools to center the text or move it to the left or right side of the text field.
To change the text alignment:
Access the Overlay Editor for your event
Select existing text or add a new text field
From the text editing toolbar, click the horizontal line button to cycle through the different alignment options
Note: The alignment is relative to the width of the text field, or object selection box.
If the text field is the same size as the text you may not see a difference when changing the alignment.
To fix this, click and drag the circle on either side of the text field.
How To
Delete Text
If you want to remove a text field entirely, you can delete it by using the Text Editing Tools.
To delete text:
Access the Overlay Editor for your event
Select the text you want to delete
From the text editing toolbar, click the trashcan icon