
Connecting Queso to Dropbox
Access all of Queso’s event captures from anywhere, create a backup, or project them onto a wall, all with a Dropbox account.
Table of Contents
Explainer
What Is Queso and Dropbox Sync?
Queso includes a feature which allows you to directly and automatically upload event captures to a Dropbox account.
While Queso is connected to WiFi, all captures from an event will be sent to a folder that shares the name of the event. This can be used alongside Live Gallery or independently.
By uploading captures to a Dropbox account, you can:
Create a automatic backup system for your events
Allow yourself or a client to actively monitor the event remotely and in real-time
Access the files during or after an event to send to a projector, make custom prints, or anything else
Step One
Sign up for Dropbox
If you don’t already have an account, you will need to sign up for Dropbox.
Dropbox has a free tier that provides 2GB of storage, which is enough for about 2-3 events, depending on the number and type of captures.
There are paid tiers available, or you could move completed events outside of Dropbox and onto another computer if you run out of space.
Step Two
Install Dropbox on Queso
Once you have an account, you will need to download and install the Dropbox application to your Queso.
You can either click the link within Queso’s Dropbox settings or you can visit Dropbox’s website from a browser on Queso to download the application.
When the download is complete, open it and following the steps to install Dropbox onto Queso.
Step Three
Start Dropbox, Sign In, and Restart QuesOS
Dropbox should start automatically after installation. If not, you will need to run Dropbox and sign into your account.
When Dropbox is running with your account signed in, exit the QuesOS app (if it is still running), and relaunch QuesOS.
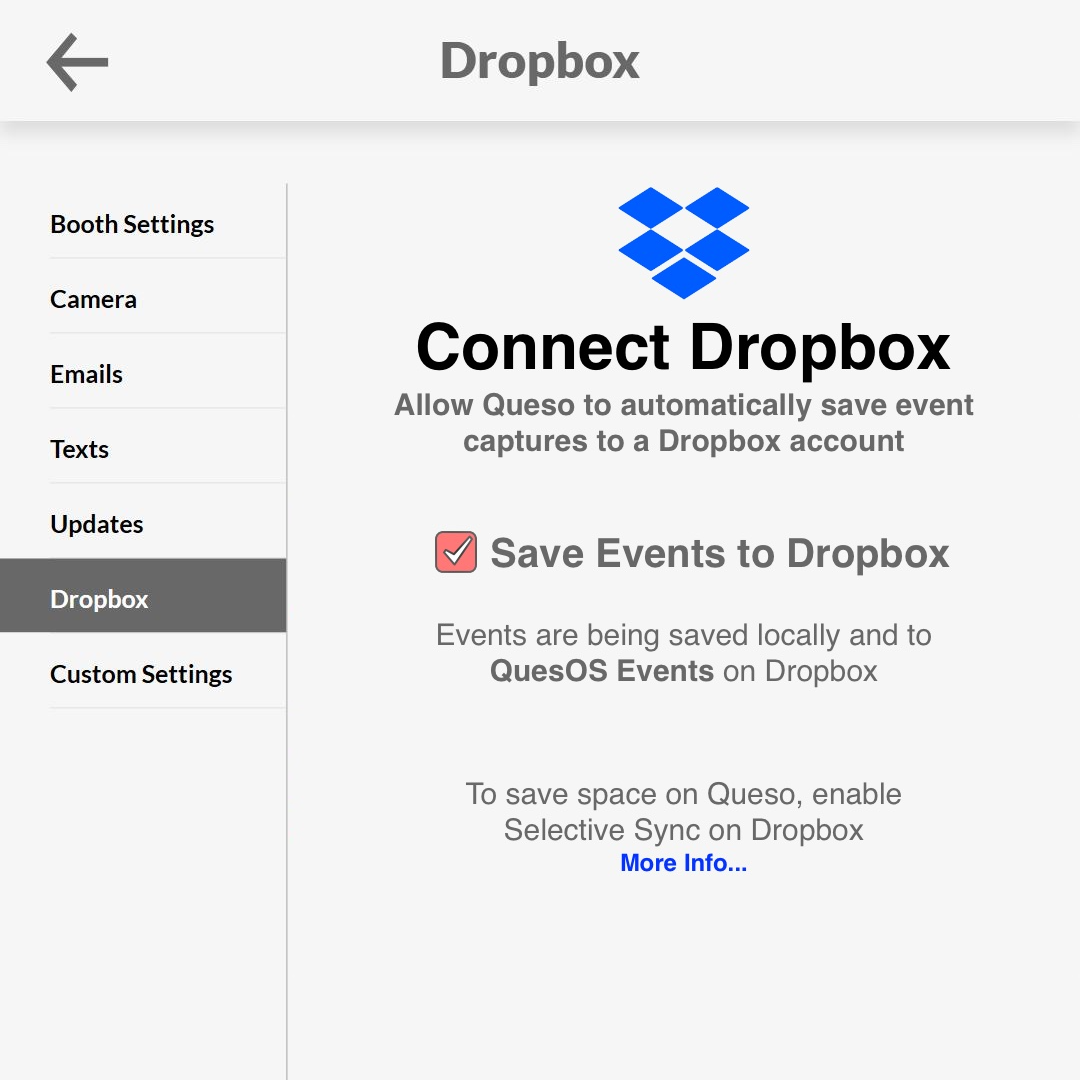
You should now be able to go into the Dropbox settings on QuesOS and turn on Save Events to Dropbox.
With Save Events to Dropbox turned on, all future events will be saved both to the Queso booth and on Dropbox within a folder titled QuesOS Events.
Note: If you ever need to stop sharing to Dropbox, simply uncheck the box and events will only be saved locally.
What To Know
Managing Queso and Dropbox Storage

If you already have a Dropbox account, you most likely already have files stored online. If that is the case, when you install and sign into Dropbox those files will start syncing and downloading to your Queso. Depending on how many files you already have saved to your Dropbox, this could take up a significant amount of hard drive space. To prevent this, you will want to enable Selective Sync within Dropbox.
Start from the Windows desktop and swipe from from the bottom of the screen to bring up the Taskbar. Tap the Dropbox icon to bring up the Taskbar Menu. Tap your Dropbox Profile Image or initials to bring up the Dropbox Submenu and select Preferences.
In Dropbox Preferences head over to Sync and select Selective Sync.
You will then be presented with a list of folders found on your Dropbox account. Check off any folders you don’t need. Make sure to keep QuesOS Events checked so that events can keep syncing.