Explainer
How To
What To Know
- Creating Photo Templates
- Customizing Photo Templates
- Photo Template Layers
- Frames
- Photo Template File Requirements
- Uploading Custom Designs
- FAQ
Explainer
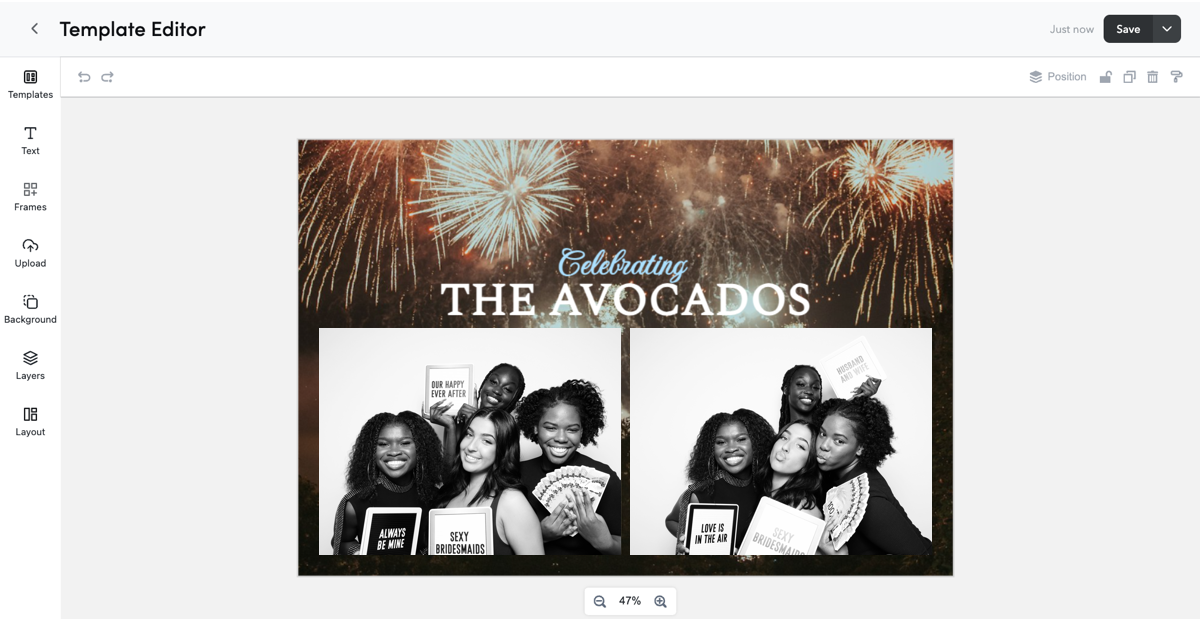
Creating & Customizing Photo Templates
A Photo Template combines one to four captures with customizable design content. Photo Templates can include capture Frames, text, uploaded graphics, and a Background arranged together on the design canvas.
Photo Templates can start from a pre-made available design from the Fiesta Design Library, or a new layout. They are customized in the Design Studio Editor before being used with an event.
Note: Design Studio is only available through the Fiesta Web App on computer or mobile web browsers.
What To Know
Creating Photo Templates
A new Photo Template begins by selecting the Photo Template design type and an available size or starting layout within Design Studio. The selected layout determines the initial canvas and Frame arrangement.
After the Photo Template opens in the Design Studio Editor, the starting design can be customized or rebuilt using the available editor tools.
How To
Create A Photo Template
- Log in to the Fiesta Web App
- Select Design Studio from the top navigation bar
- Select Create Design in the upper-right
- Select Photo Template
- Select the desired Photo Template size or layout
- Select the desired starting layout to open the Design Studio Editor
What To Know
Customizing Photo Templates
The Design Studio Editor provides several tools for changing the appearance and capture layout of a Photo Template.
- Text: Add and customize text
- Frames: Add and arrange photo placeholders
- Upload: Add custom images and graphics
- Background: Apply a color or Background image
- Layers: Reorder, hide, lock, or delete design content
- Templates: Browse available designs
Design content can also be resized and repositioned directly on the canvas. Alignment guides, zoom controls, multiple selections, Undo, and Redo provide additional control while editing.
How To
Customize A Photo Template
- Log in to the Fiesta Web App
- Select Design Studio from the top navigation bar
- Select a Photo Template from My Designs to open it in the Design Studio Editor
- Select Frames to add or adjust photo placeholders as needed
- Select Text to add or customize text as needed
- Select Upload to add custom images or graphics as needed
- Select Background to change the Background as needed
- Select Layers to adjust the stacking order or manage design content as needed
- Reposition or resize design content directly on the canvas as needed
- Select Save in the upper-right
What To Know
Photo Template Layers
Photo Template content is arranged in a stacking order. Content higher in the Layers panel appears in front of content positioned below it when items overlap.
- Background: Appears behind the other design content
- Frames: Define where captures appear in the finished Photo Template
- Text: Adds editable text that can be resized and repositioned
- Uploaded Graphics: Adds logos, decorative graphics, or other custom images to the design
Layers can be reordered without moving their position on the canvas. Individual Layers can also be hidden, locked to prevent changes, or deleted.
What To Know
Frames
Frames define the size and position of captures in the finished Photo Template.
A Photo Template requires at least one Frame and can include up to four. Frames are numbered from 1 through 4 to indicate the order in which captures are placed into the Photo Template.
What To Know
Photo Template File Requirements
Custom files used with Photo Templates must meet Fiesta file requirements. Full-canvas Background or Overlay artwork should match the dimensions of the selected Photo Template to maintain the intended appearance.
Photo Template Background
- File Format: JPG or PNG
- Maximum Resolution: 300 ppi
- Maximum File Size: 10MB
Capture & Print Size |
Portrait |
Landscape |
Printing Supported |
2x6 |
600 x 1800 |
1800 x 600 |
✔ |
4x6 |
1200 x 1800 |
1800 x 1200 |
✔ |
4.5x6 |
2316 x 3088 |
3088 x 2316 |
✗ |
6x6 |
1800 x 1800 |
✗ |
|
Photo Template Overlay
- File Format: PNG with a transparent Background
- Maximum Resolution: 300 ppi
- Maximum File Size: 10MB
Capture & Print Size |
Portrait |
Landscape |
2x6 |
600 x 1800 |
1800 x 600 |
4x6 |
1200 x 1800 |
1800 x 1200 |
4.5x6 |
2316 x 3088 |
3088 x 2316 |
6x6 |
1800 x 1800 |
|
Uploaded Graphics
- File Format: JPG or PNG
- Maximum Resolution: 300 ppi
- Maximum File Size: 10MB
- Graphics can use any dimensions within the supported file limits
Note: Full-canvas Background and Overlay artwork with different dimensions than the selected Photo Template may not display as intended.
Learn more about Fiesta File Requirements
What To Know
Uploading Custom Designs
Custom designs can be created outside of Fiesta and uploaded into Design Studio.
If using third-party design software, make sure that your file’s dimensions and orientation match those of the Photo Template layout selected in Design Studio to avoid upload errors or display issues.
Learn more about Photo Template File Requirements
How To
Upload Custom Designs
- Log in to the Fiesta Web App
- Select Design Studio from the top navigation bar
- Select Upload Design in the upper-right
- Select the design file to upload
- Select Upload
What To Know
FAQ
Can I change a Photo Template into an Overlay after it is created?
- No. Photo Templates and Overlays are separate design types and cannot be converted from one design type to the other in Design Studio.
Can a Photo Template use more than one Background?
- No. A Photo Template uses one Background for the design canvas. Additional images or graphics can be added separately through Upload.
Can I automatically change an existing Photo Template to another size?
- No. An existing Photo Template cannot be automatically converted to another overall size. Create or select a Photo Template using the desired size before customizing the design.